Reduce Scrapping and Smelting, Promote Component Reuse > Complete Machines
> 2000 and up
> Cook County
> Used
> Spare parts for diy music led display
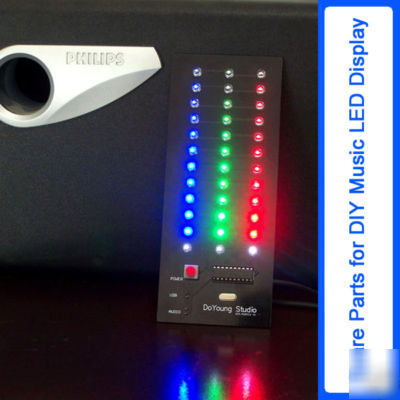
Spare parts for diy music led display
Spare Parts for DIY Music LED Display
Note: Do it by yourself, this item has Spare Parts only.
PROFESSIONAL LCD MODULE SUPPLIER FROM SHENZHEN CHINA
Please visit my store (E'go China) for more LCD Module, thanks!
(We do wholesale, please inquire us for the detail.)
Attention: The photos are for your reference only.
# DIY Sample, PCB, LED, MCU, Capacitor, Resistor, and Crystal
# Glossy black PCB design and a black line sound complement each other
# Ultra-bright straw hat type LED light scattering type
# LED light flashes to follow the music loudness, filling cool music, texture
# Automatic gain adjustment (based on the input volume automatically adjusted to best display effect)
# SCM software has been written, do not use the ISP download cable operator, or program can not be restored
# LED light soldering temperature shall not exceed 350 degrees Celsius, continuous welding time not more than 2 seconds
# Note that the direction of welding power switch in the wrong direction will make the opposite switch position
The Process of DIY LED MUSIC Display
Black PCB make it showing Better
0805 30pF Capacitor 2PCS / 0805 0.1uF Capacitor 1PCS / 0805 5.1K Resistors 1PCS
We'll give you add extra 1PCS each kind.
Add tin to one side of the four SMD electronics filed first
Fixed the SMD electronics parts on PCB
Add tin to another side to fix the SMD electronics parts
Insert the 24MHz Crystal to the hole
Solder it on PCB, and then cut it, you should Insert in on the back of PCB also
Audio & Power Supply Interface are the same
Solder them and then cut the balance
Insert the IC Socket to the hole
You should note the direction of Power Button
Please make them one-to-one correspondence
Solder it and then cut the balance
Congratulations, System Electronics Parts Complete.
Insert three white LED on the Bottom line.
Note: Square is +, and Round is -
Insert all other LED, Left is Blue, Middle is Green, Right is red
Note: Before you insert them, you should test the color of LED by Round Cell
Solder one Pin of LED on Board
Solder another Pin of LED on Board
Cut the balance Pin of LED on Board
Insert the MCU to IC Socket, note the direction of MCU
Clean the PCB Board by yourself
Please contact with us in English, we are sorry for the inconvenience caused to you, thank you!
Carrier: Hongkong Post (Free to all over the world)
Seller will be NOT held responsibility for any lost or damage for posting items.
Postage is not returnable. We will refund you the price of the item less postage. Seller is not responsible for the postage of returning items.
